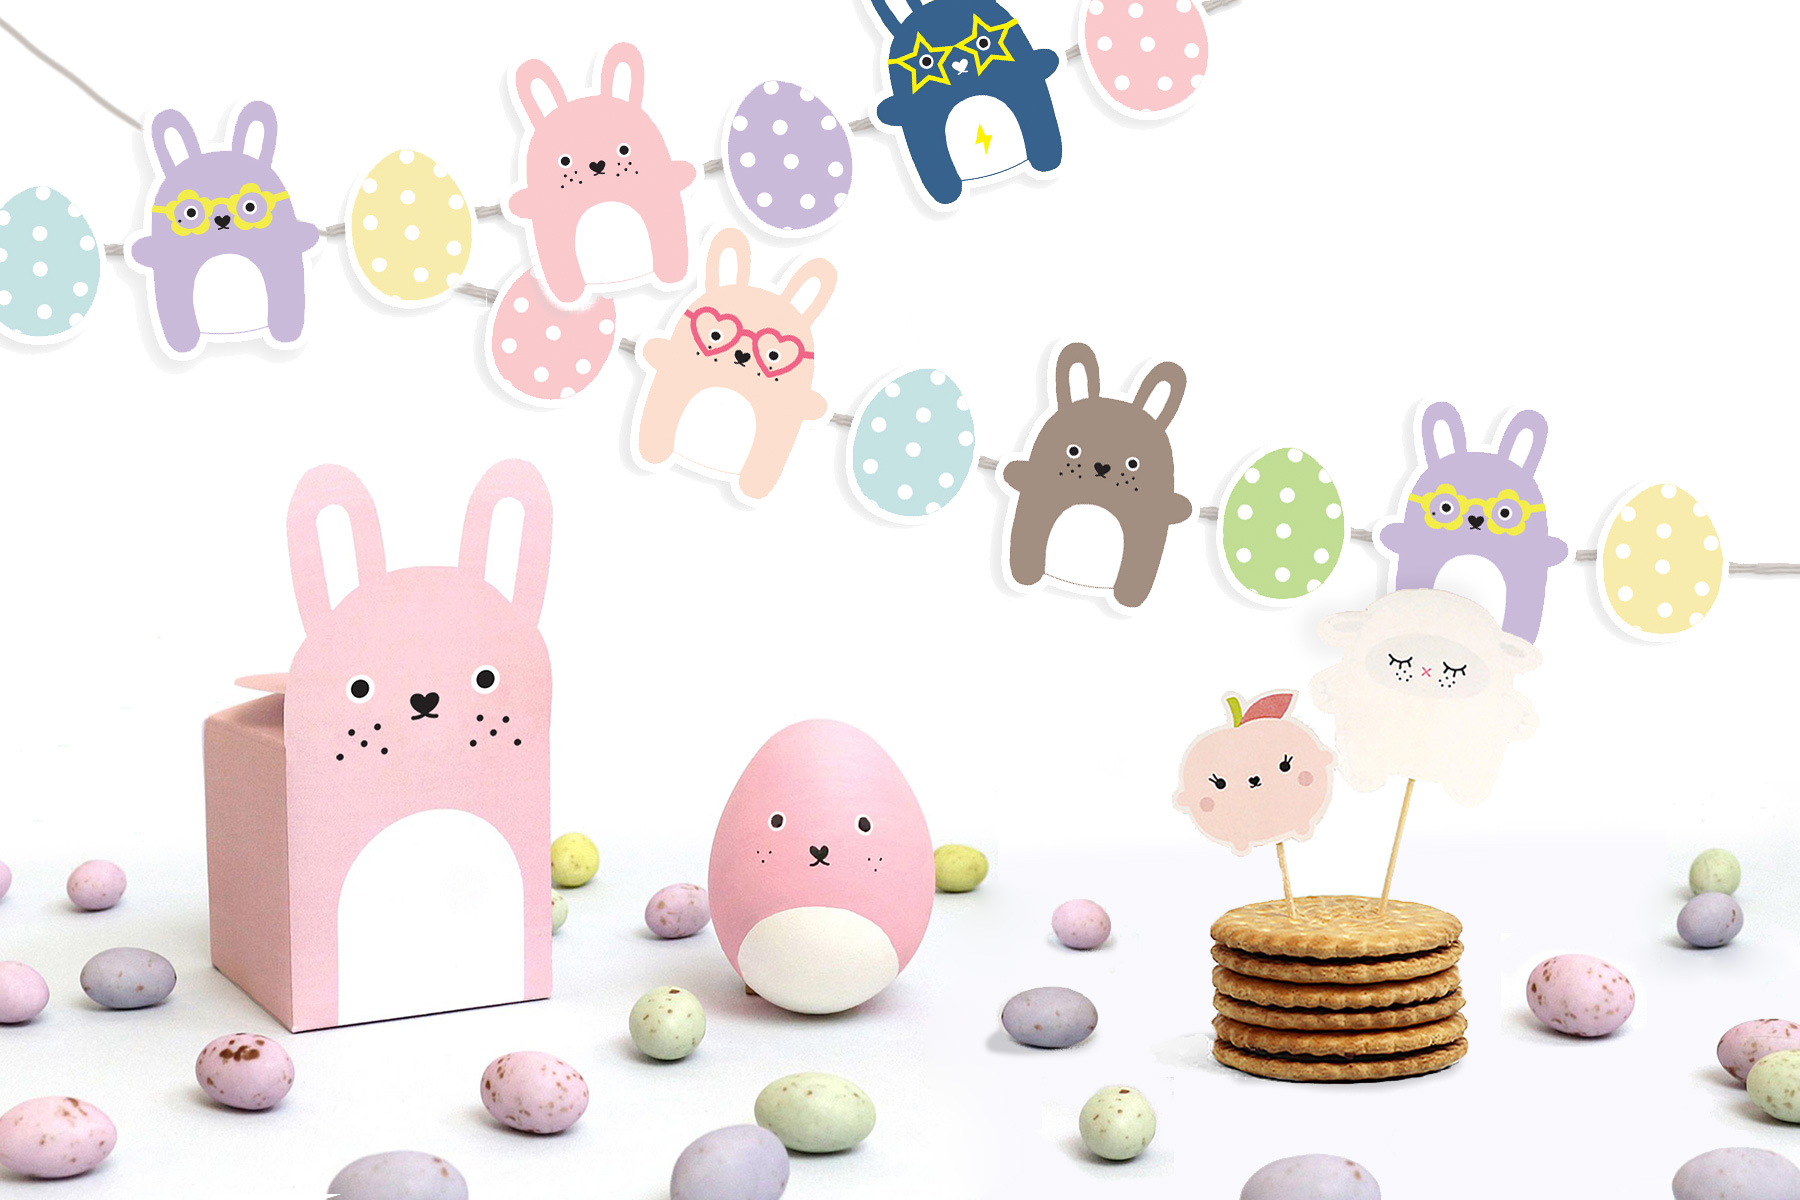
Easter Printable Pack
Exciting news - You can now download our Easter printable activity pack, full of arts and crafts fun. Read on for more info including step-by-step instructions.
This Easter we've launched our first ever downloadable product! It's a super fun arts and crafts activity pack, full of creative Easter things to make and do. If you haven't downloaded yours yet then click here. Once you purchase we email you an instant download link. Then just click print, collect a few bits like scissors and tape, and get making! Super fun for children, teens or grown-ups too! Scroll down for all the step-by-step instructions:
Cake toppers
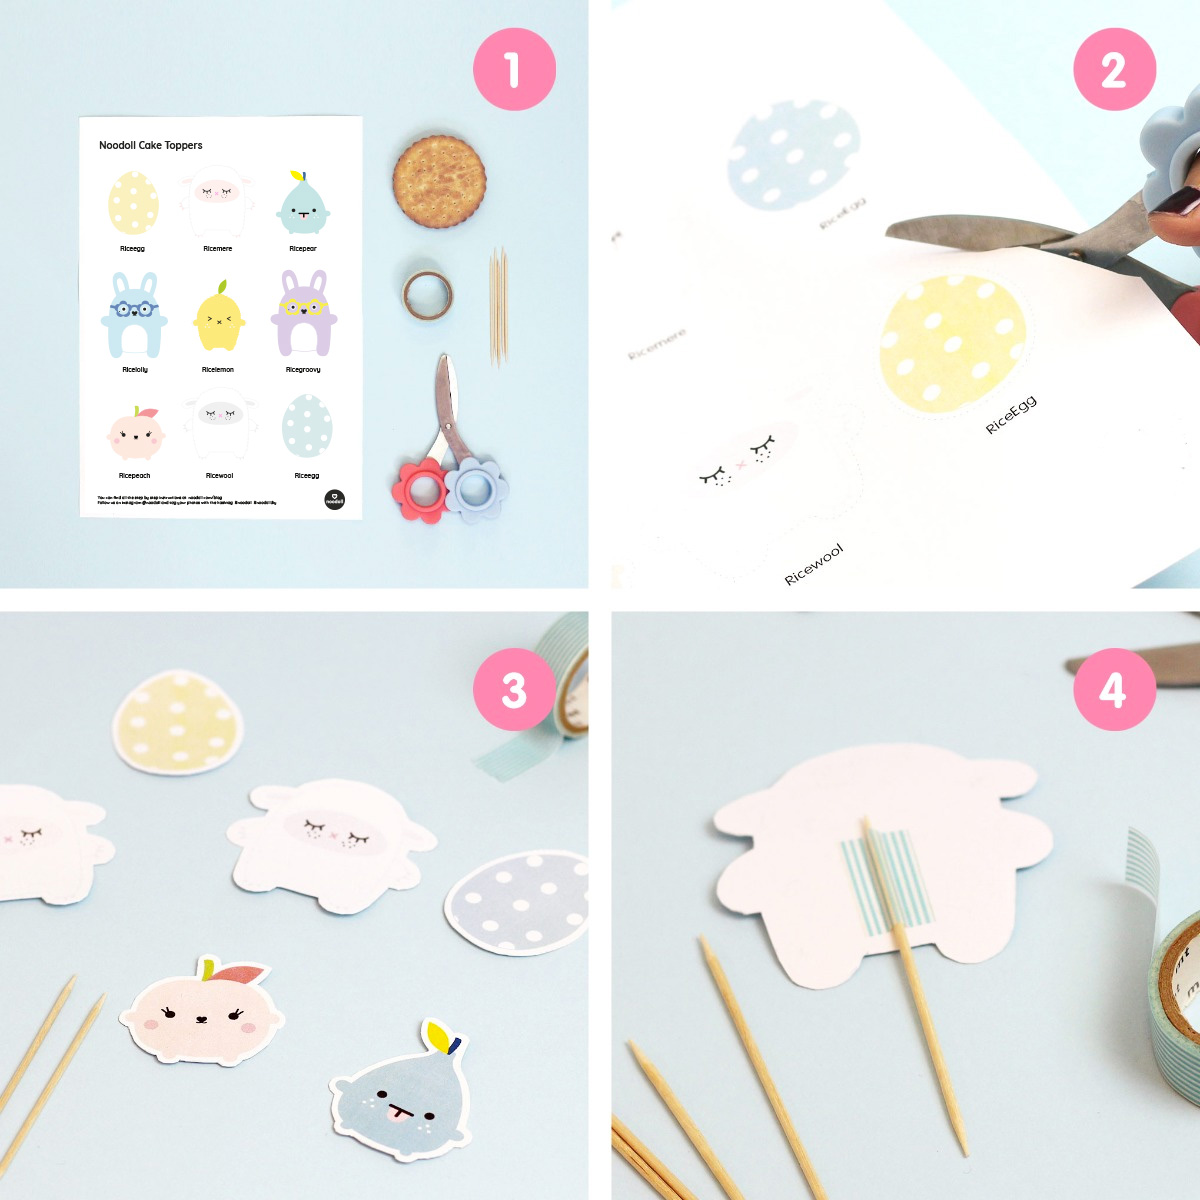
Step 1: For this DIY project you will need: the template printed on white paper, a pair of scissors, some tape, some toothpicks and some yummy cakes to decorate!
Step 2: Carefully cut out all of the different elements on the page following the dotted lines.
Step 3 and 4: Now that all the shapes are cut out, use some tape to stick a toothpick to the back of each shape as shown above.
Now you can use them to decorate your cakes and muffins
Easter boxes
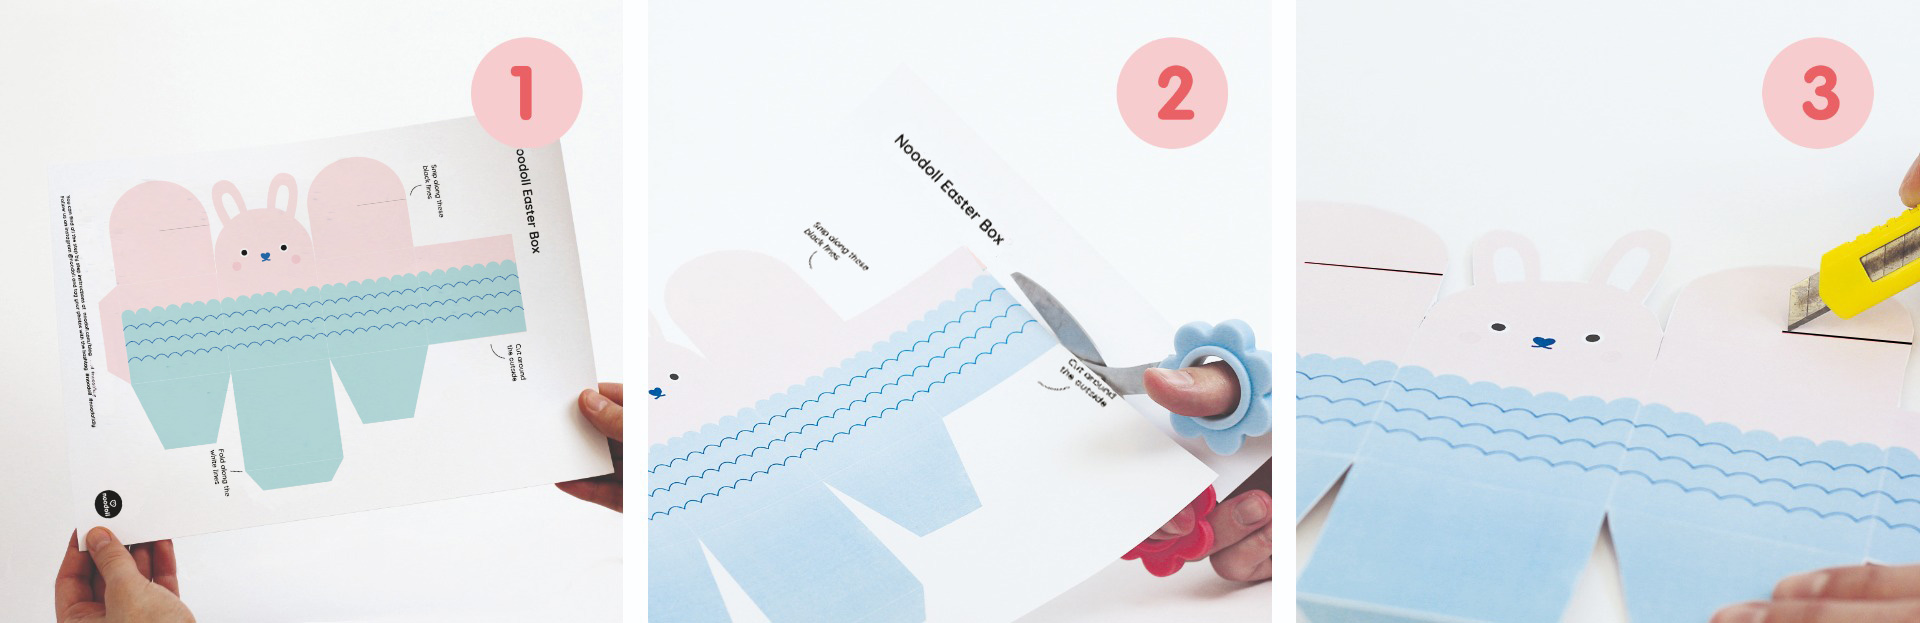
Step 1: For this DIY project you will need the template printed on thick white paper, a pair of scissors, some glue and (optional!) a craft knife.
Step 2: Cut out the template from the page following along the edge of the design.
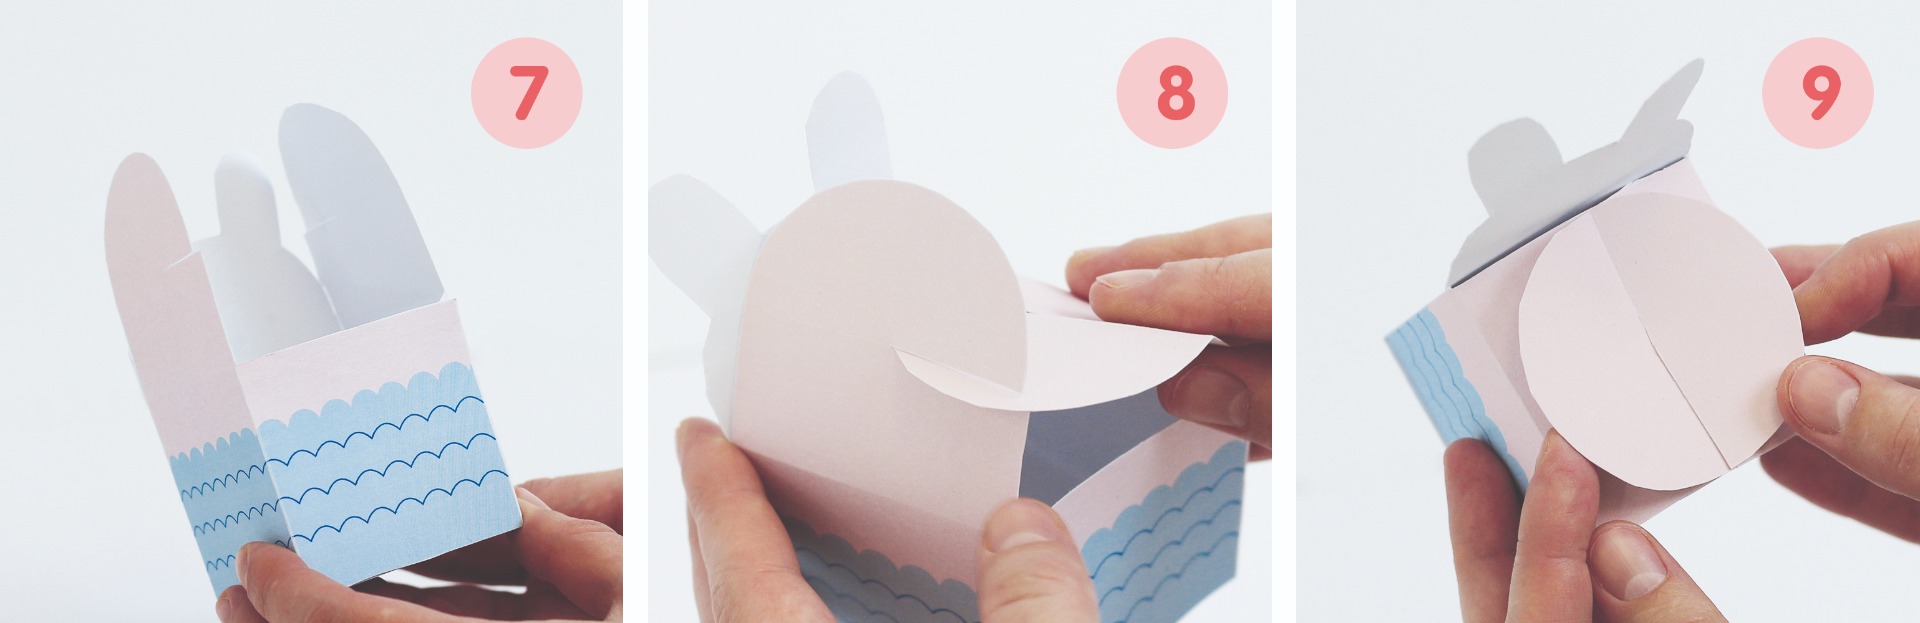
Step 3: Using a craft knife or scissors, cut along the black (or yellow for Riceberry) lines at the top of the lapels on the box.
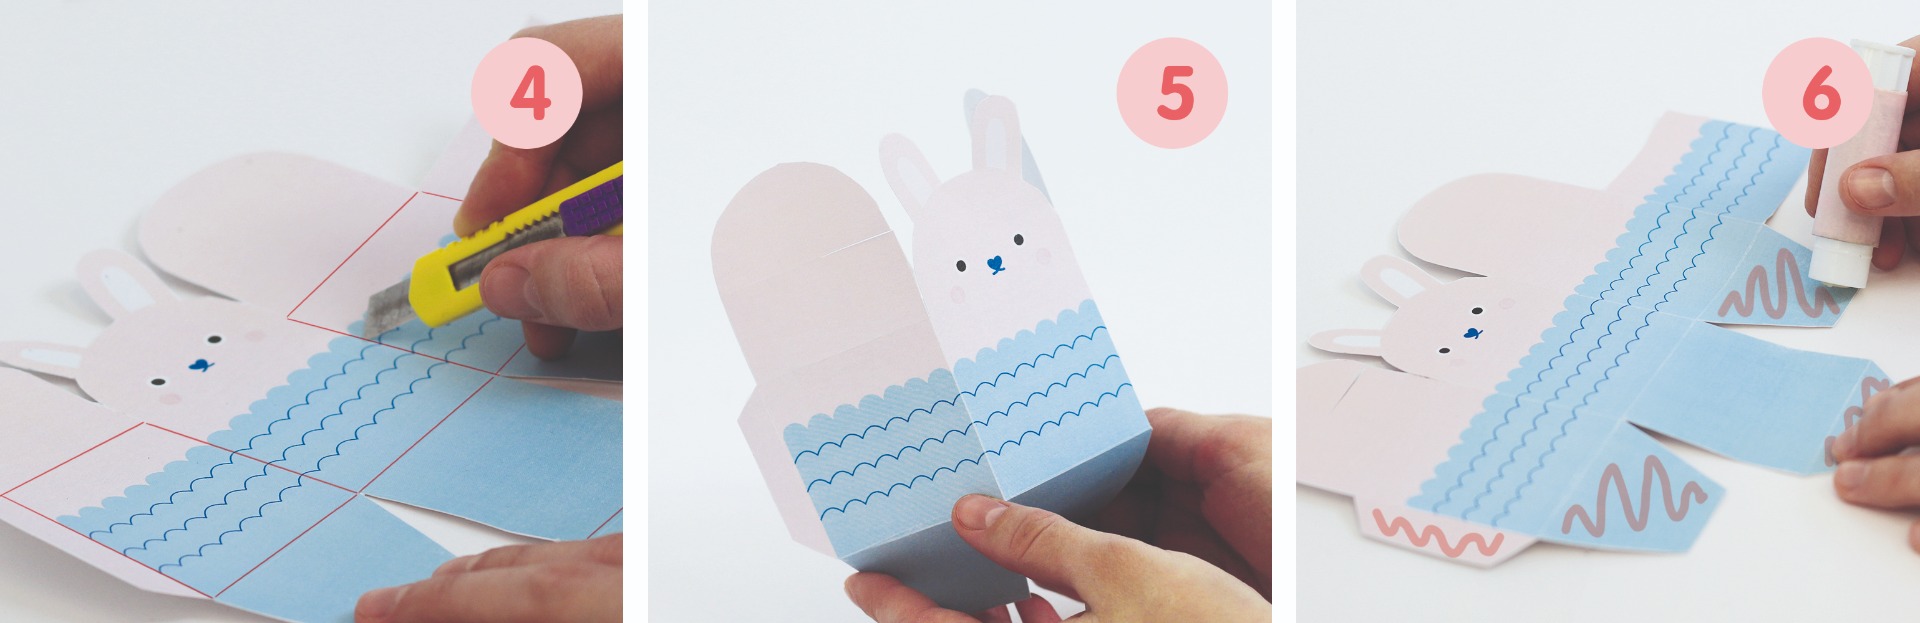
Step 4: If you have a craft knife or something sharp, score the white lines on the body of the box. You might be able to just fold here without scoring.
Step 5: Now gently fold your box together along the scored lines.
Step 6: Apply glue to all the tabs as shown on the image above.
Step 7: Now you can glue all the tabs together to make your box.
Step 8 and 9: To close your box, all you have to do is slide each side the two parts together
Egg Hunt
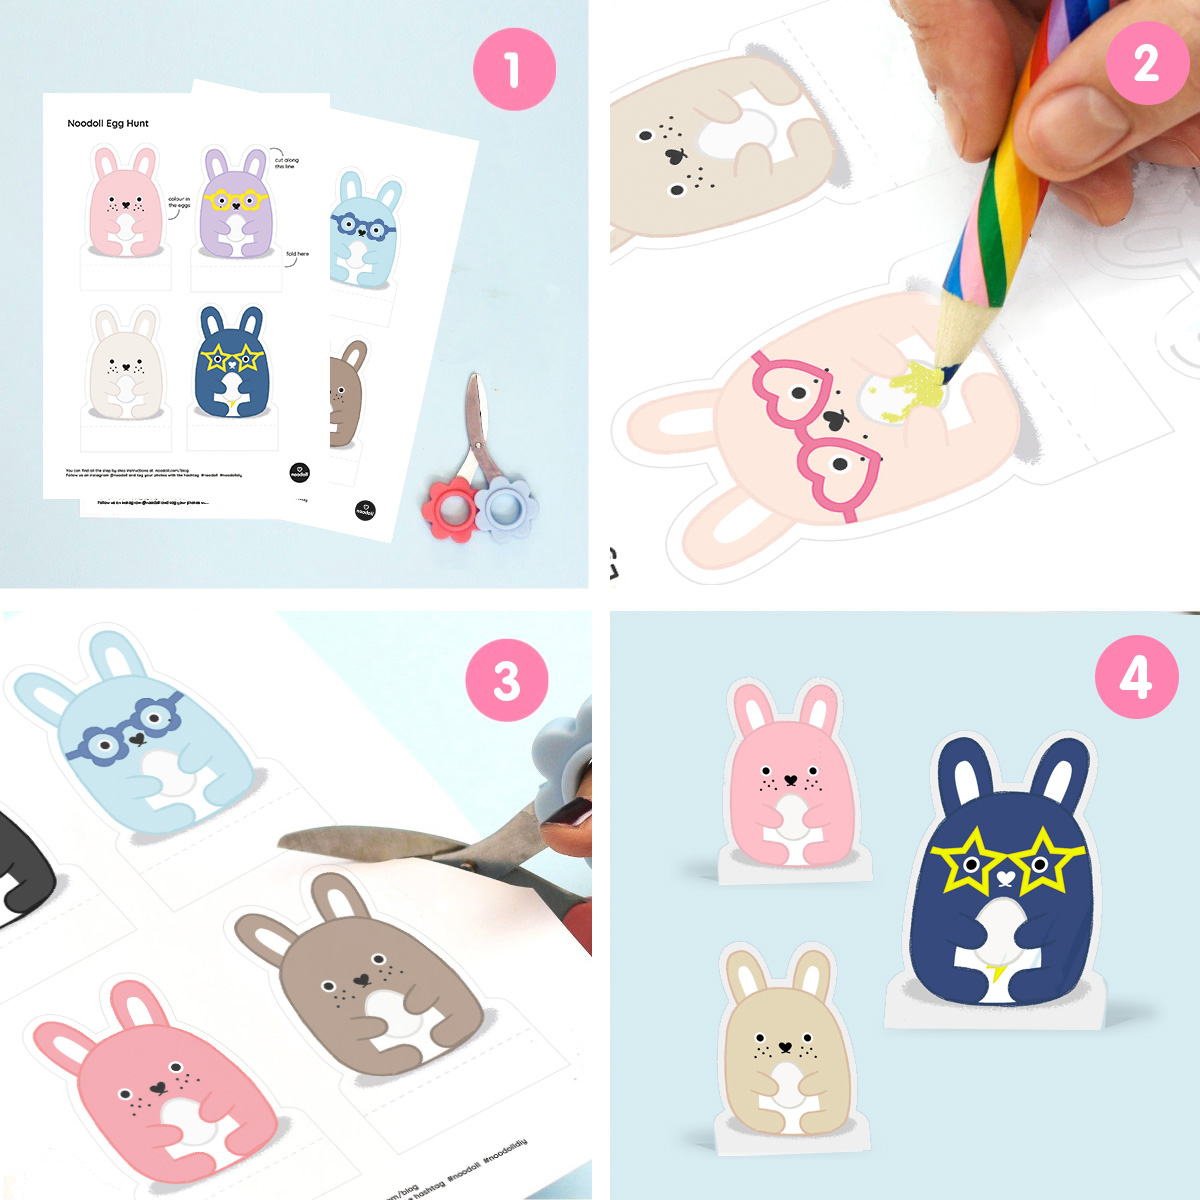
Step 1: You will need your printed sheets on thick white paper, scissors, and some colouring equipment like pencils or felt tips.
Step 2: Design your eggs. Colour them in however you like! Then design two rabbits of your own using the templates provided.
Step 3: Cut everything out along the solid line and fold along the dotted line to create a base for your rabbits to stand up on.
Step 4: Time to hide them!
Step 5: Now the best part - the hunt begins! Challenge a friend or family member (or ricemonster!) to find all of the rabbits/eggs.
Easter bunting
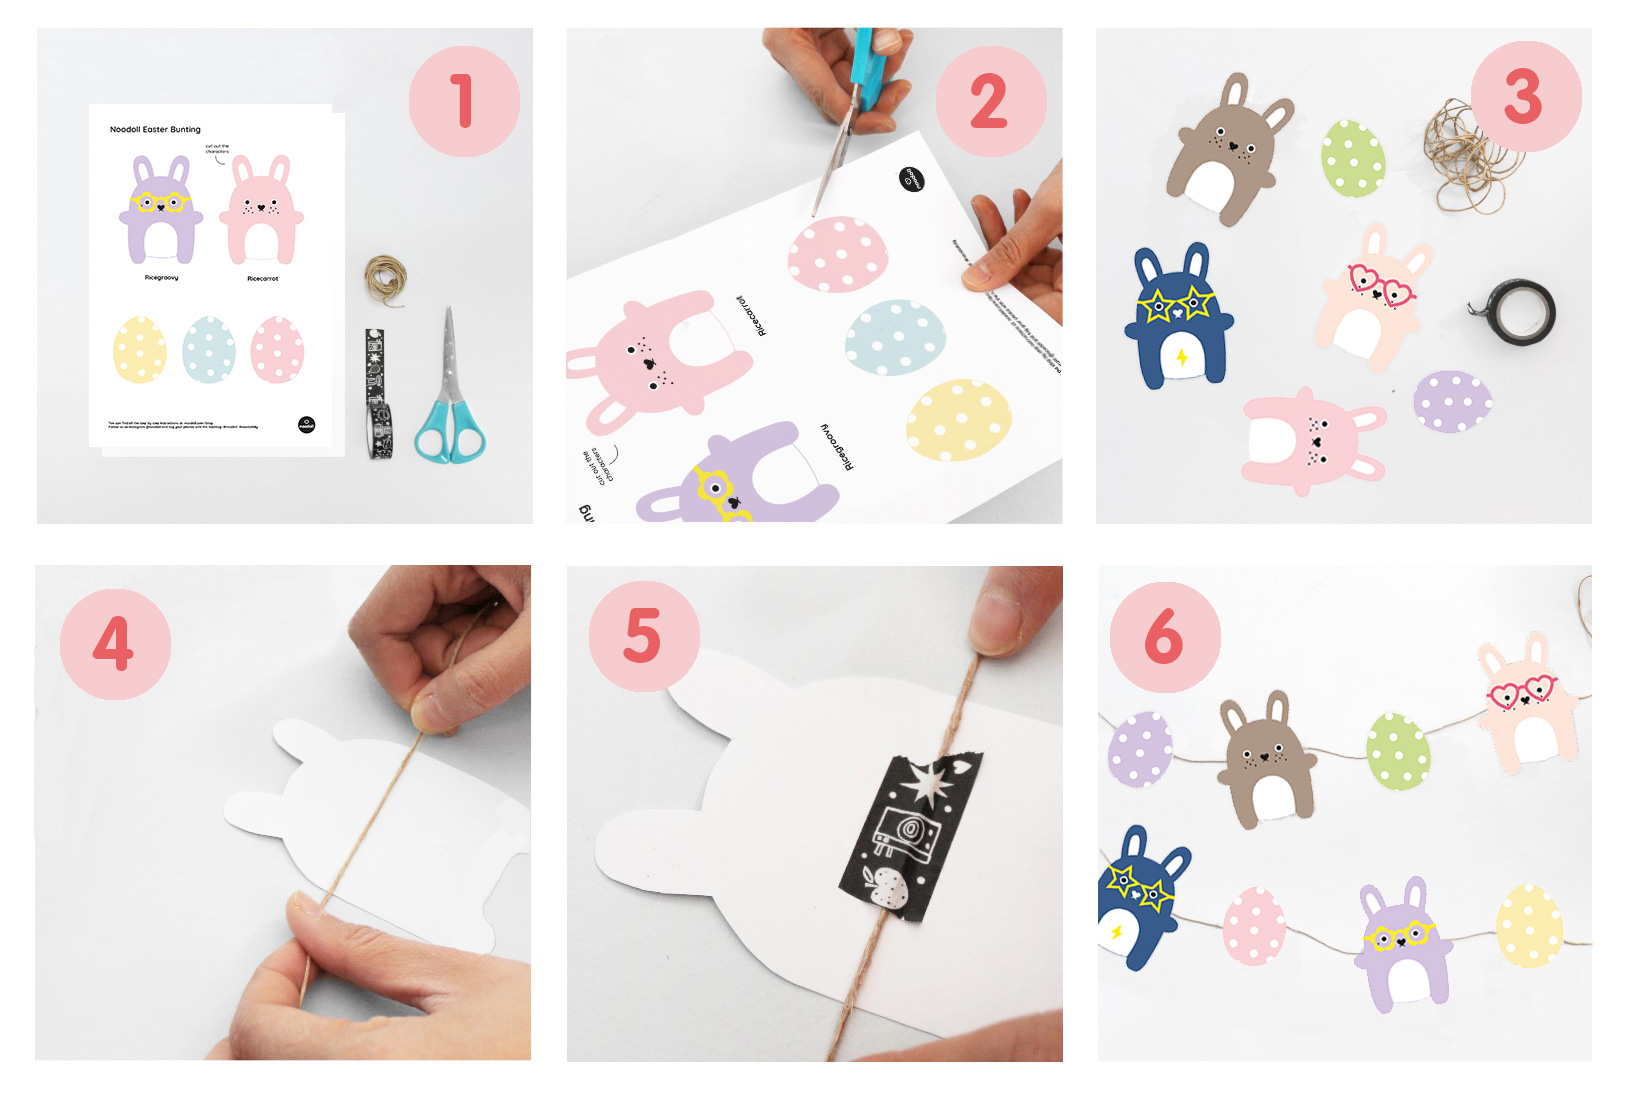
Step 1: Gather your materials. For this activity you will need, your printed activity sheets, string, tape and scissors.
Step 2: Cut your characters out
Step 3: Decide what you want your Easter bunting to look like. What order / pattern will you make?
Step 4: Turn your characters face down and lay your string on top, through the middle to make them secure.
Step 5: Hang it up - you're ready to party!
Easter Bonnet
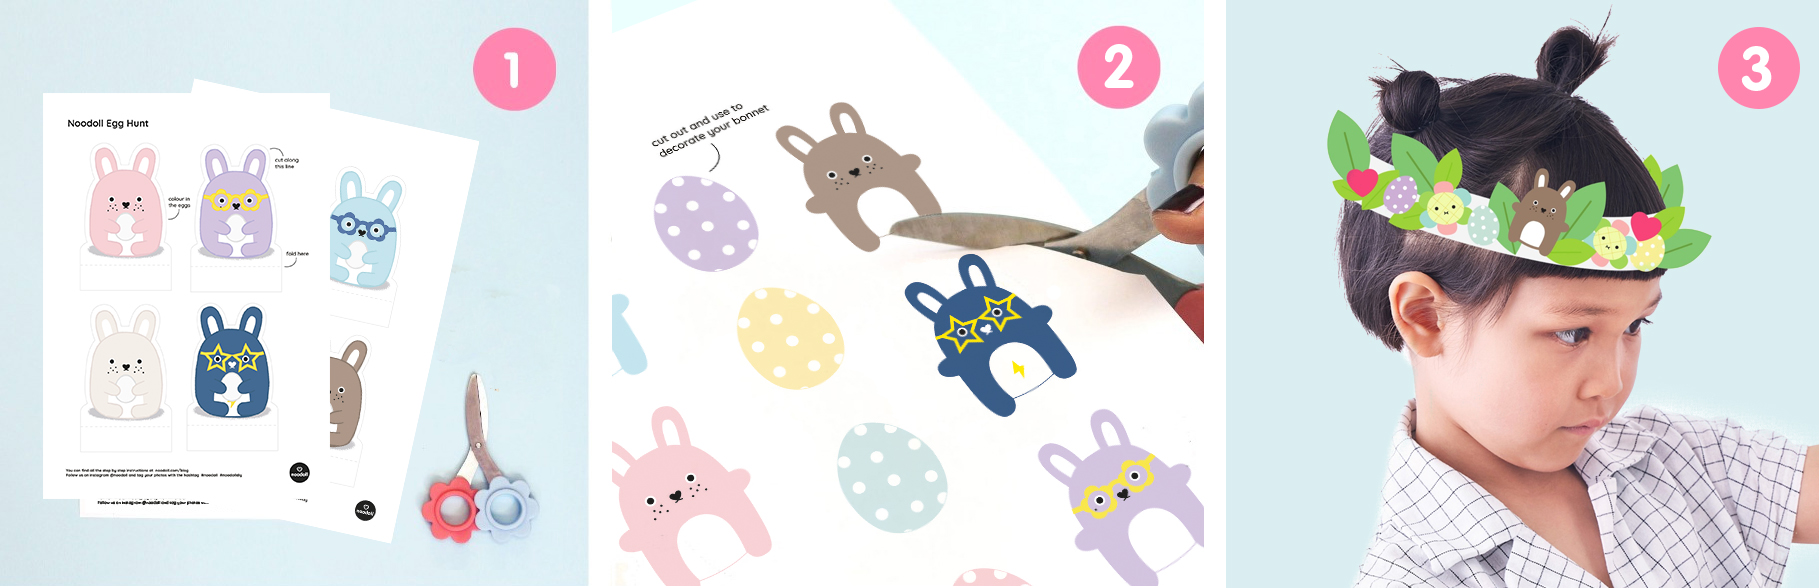
Step 1: You will need to print out all the sheets. We suggest printing the headband on thick paper, or just use it as a template and cut around some thin scrap card (like cereal boxes). Also grab some glue, tape and scissors.
Step 2: Cut everything out.
Step 3: Glue or tape the chararcters, objects, eggs and more to your headband strap. Then fit it around your head and secure with tape!
Easter Garland
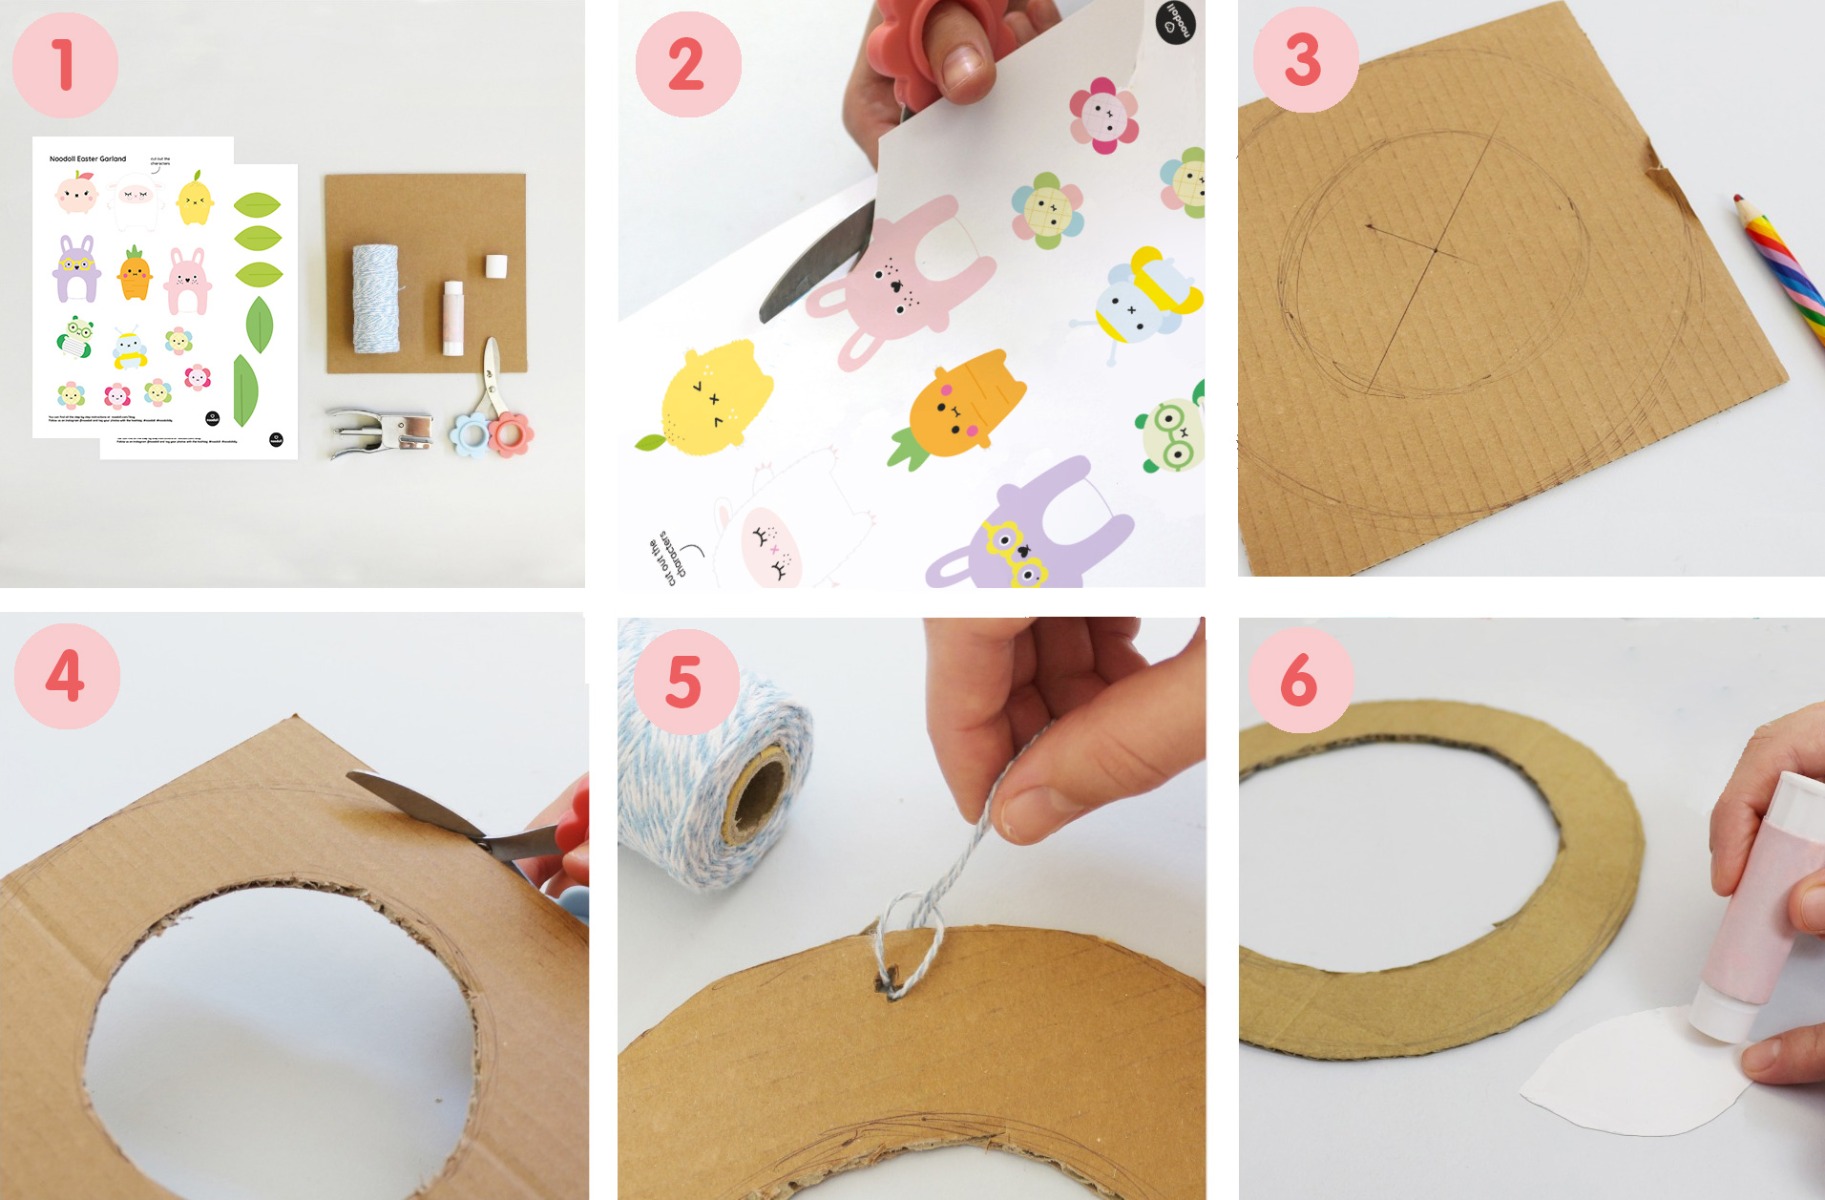
Step 1: First gather everything you need. Print out your activity sheets, grab some scissors, string, glue, a hole punch (or anything to make a little hole with) and a square piece of scrap card around 20 - 30 cm.
Step 2: Cut out all of your characters, objects and leaves and decided how you will arrange them on your garland.
Step 3: Draw a hoop shape on your card. This will be the backing of your garland.
Step 4: Cut it out.
Step 5: Make a little hole at the top and thread some string through it. This will be how your garland hangs.
Step 6: The best part! Using glue, attach all of your decoration to create a beautiful Easter garland to hang on your door.
That's everything. Make sure you download your Easter activity pack by clicking here, and don't forget to tag us @noodoll in any Instagram photos. We can't wait to see whatyou make! Enjoy the fun Noo-fam!