
DIY Space Mobile
In Ricetown we are celebrating bonfire night this weekend, there will be fireworks and a lot of fun things. We have created a sweet space themed baby mobile DIY activity for you guys to celebrate this day!
Download the template and follow the steps below to learn how to make your own space themed mobile!
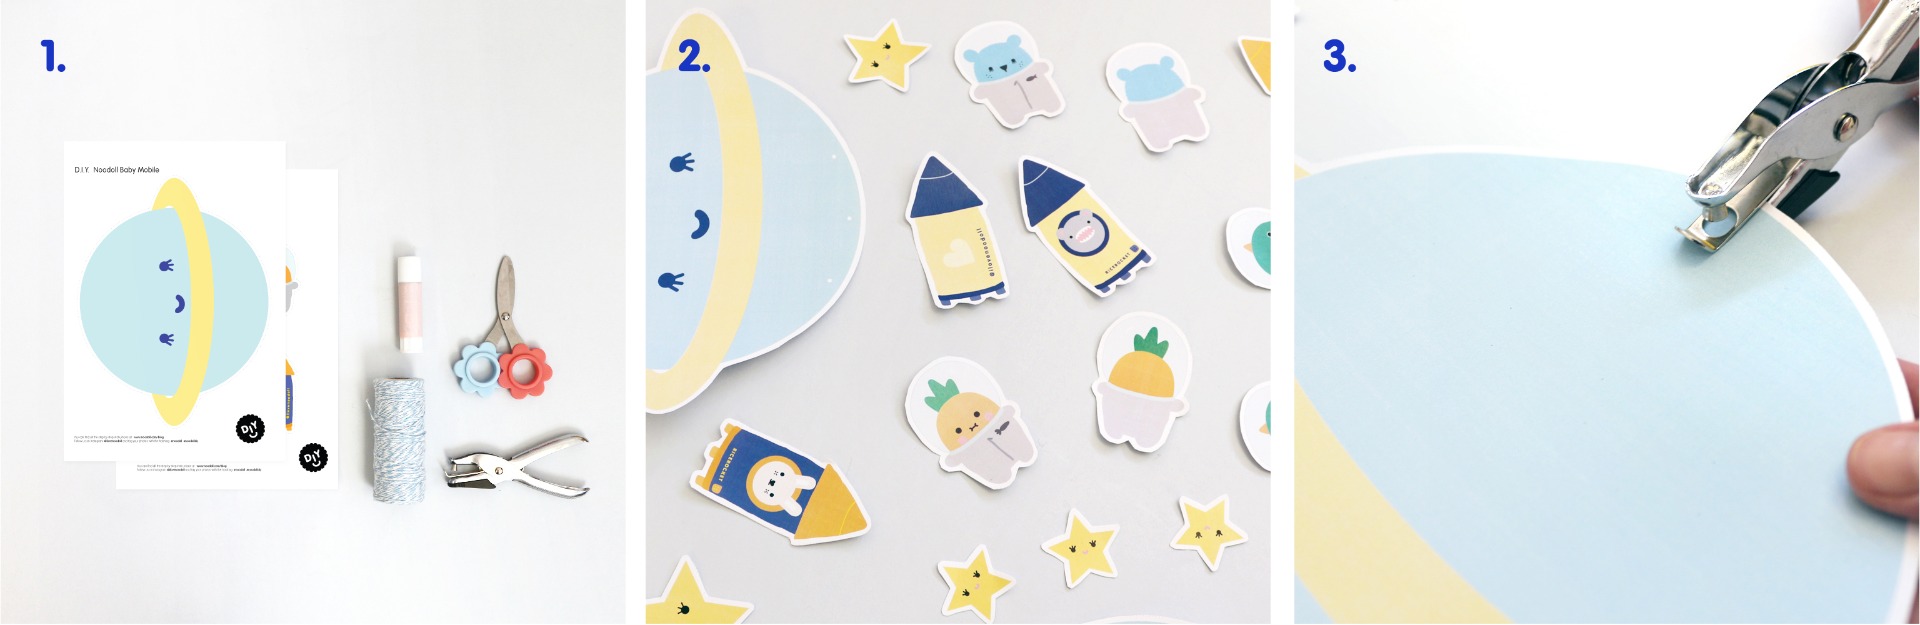 Step 1: For this activity, you will need the printed template, some string, a glue stick, a pair of scissors and a hole puncher.
Step 2: Start by cutting out all the different parts of the mobile, make sure to follow the dotted line.
Step 3: Punch a hole at the top of the planet, and three at the bottom, make sure that you punch the holes through the back of the print out.
Step 4: Cut four pieces of string about 20-30cm long and tie one through each hole, then apply some glue to the front and back of your planet shape.
Step 5: Glue the two parts together, hiding the ends of the string.
Step 6: Now you can start to decide where all the smaller shapes will go.
Step 1: For this activity, you will need the printed template, some string, a glue stick, a pair of scissors and a hole puncher.
Step 2: Start by cutting out all the different parts of the mobile, make sure to follow the dotted line.
Step 3: Punch a hole at the top of the planet, and three at the bottom, make sure that you punch the holes through the back of the print out.
Step 4: Cut four pieces of string about 20-30cm long and tie one through each hole, then apply some glue to the front and back of your planet shape.
Step 5: Glue the two parts together, hiding the ends of the string.
Step 6: Now you can start to decide where all the smaller shapes will go.
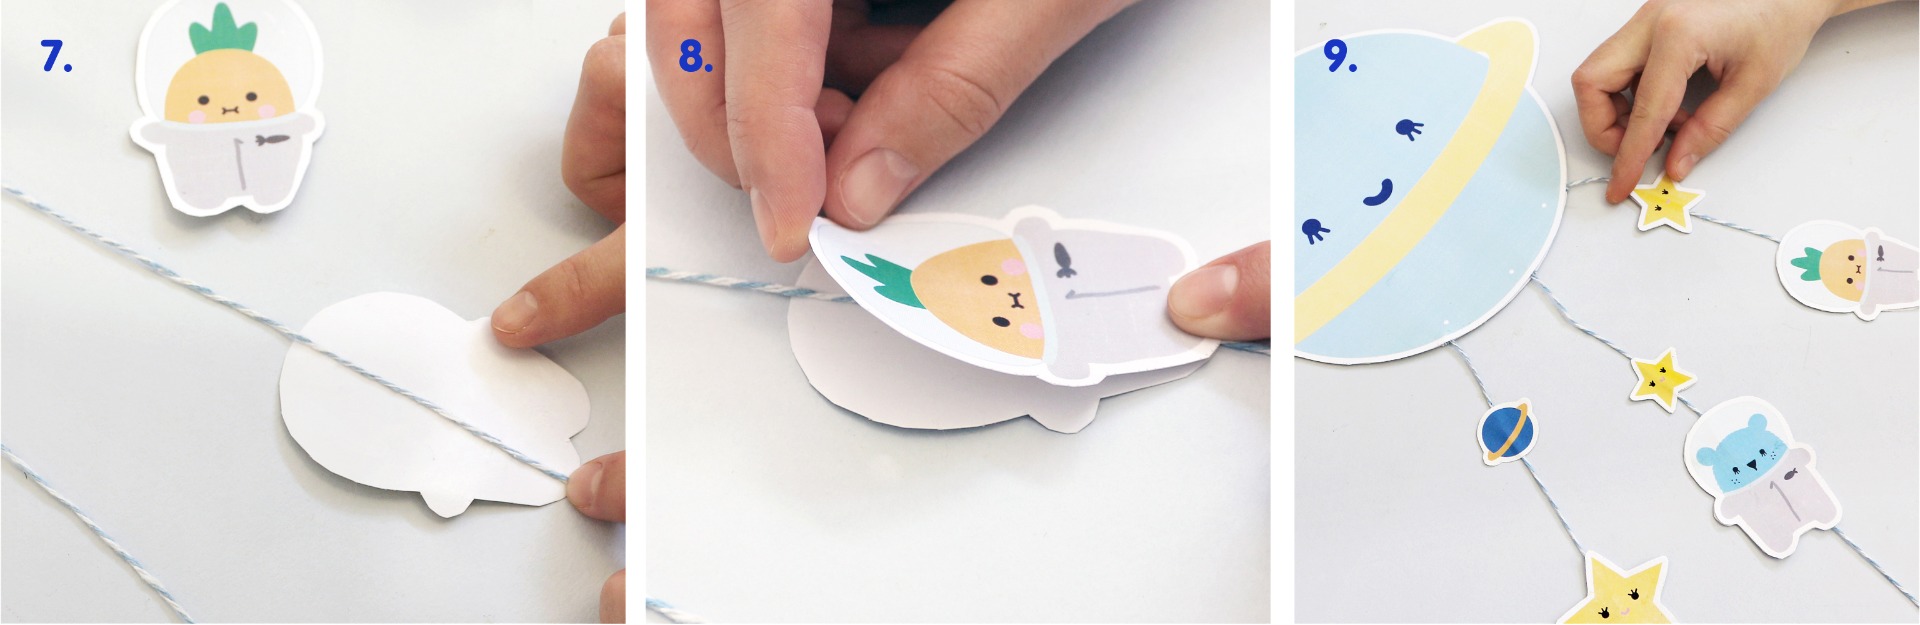 Step 7: Once you have decided on an order for them, aply glue on one side of the shape and place it where you want it along one of the bottom strings.
Step 8: Then all you need to do is place the other half of the shape on top and stick them together.
Step 9: Repeat steps 7 and 8 until all of your small shapes are glued on the mobile.
Step 7: Once you have decided on an order for them, aply glue on one side of the shape and place it where you want it along one of the bottom strings.
Step 8: Then all you need to do is place the other half of the shape on top and stick them together.
Step 9: Repeat steps 7 and 8 until all of your small shapes are glued on the mobile.
We hope that you have enjoyed making this DIY space mobile! Don’t forget to share your DIY projects with us by tagging us on Instagram or Facebook with @ilovenoodoll!
Step 1: For this activity, you will need the printed template, some string, a glue stick, a pair of scissors and a hole puncher.
Step 2: Start by cutting out all the different parts of the mobile, make sure to follow the dotted line.
Step 3: Punch a hole at the top of the planet, and three at the bottom, make sure that you punch the holes through the back of the print out.
Step 4: Cut four pieces of string about 20-30cm long and tie one through each hole, then apply some glue to the front and back of your planet shape.
Step 5: Glue the two parts together, hiding the ends of the string.
Step 6: Now you can start to decide where all the smaller shapes will go.
Step 7: Once you have decided on an order for them, aply glue on one side of the shape and place it where you want it along one of the bottom strings.
Step 8: Then all you need to do is place the other half of the shape on top and stick them together.
Step 9: Repeat steps 7 and 8 until all of your small shapes are glued on the mobile.
We hope that you have enjoyed making this DIY space mobile! Don’t forget to share your DIY projects with us by tagging us on Instagram or Facebook with @ilovenoodoll!