DIY Pumpkin Decorating
This week learn how to turn pumpkins into your favourite Ricemonsters with this fun pumpkin decorating DIY project!
Halloween is fast approaching and monsters around Noodoll town are getting all the finishing touches ready for their big spooky party!
Follow the steps below to learn how to make your own Ricemonster pumpkin!
 Step 1: For this DIY project you will need a pumpkin (preferably small), some acrylic paints, a paint brush, a pair of scissors, some coloured felt, a pencil and glue.
Step 2: Select your pumpking, if you are creating more than one Noodoll pumkin, you can choose different sizes!
Step 1: For this DIY project you will need a pumpkin (preferably small), some acrylic paints, a paint brush, a pair of scissors, some coloured felt, a pencil and glue.
Step 2: Select your pumpking, if you are creating more than one Noodoll pumkin, you can choose different sizes!
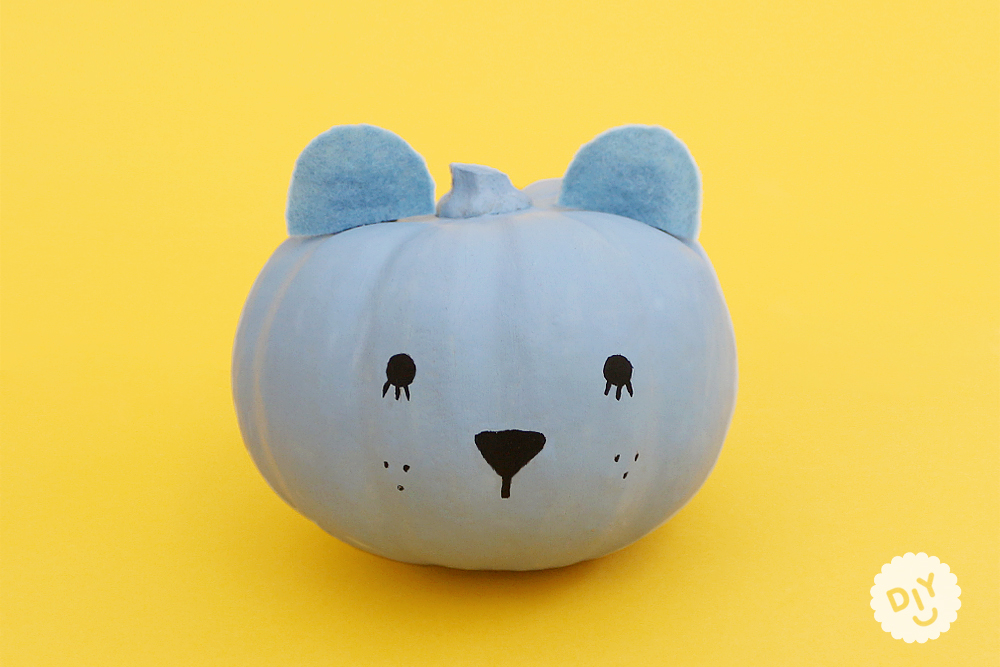
 Step 3: Before you start, choose with Noodoll Ricemonster you would like to make your pumpkin into. For this demonstration we chose the sweet Riceberg polar bear. Once you have chosen your character, mix your paint to match the colour of their fur, you will also need some black or other colours to paint their face.
Step 4: Using a paintbrush, paint the whole surface of your pumpkin. You will need to paint two layers to acheive a smooth colour, make sure you wait for your paint to dry in between layers and before going to step 5.
Step 5: Draw the Ricemonsters face onto the pumpkin using a pencil, then go over the design with a thin paintbrush and some black paint. Alternatively, you can draw the face on using a permanant marker.
Step 3: Before you start, choose with Noodoll Ricemonster you would like to make your pumpkin into. For this demonstration we chose the sweet Riceberg polar bear. Once you have chosen your character, mix your paint to match the colour of their fur, you will also need some black or other colours to paint their face.
Step 4: Using a paintbrush, paint the whole surface of your pumpkin. You will need to paint two layers to acheive a smooth colour, make sure you wait for your paint to dry in between layers and before going to step 5.
Step 5: Draw the Ricemonsters face onto the pumpkin using a pencil, then go over the design with a thin paintbrush and some black paint. Alternatively, you can draw the face on using a permanant marker.
 Step 6: Draw the Ricemonsters ears on your piece of felt using a pencil and cut them out.
Step 7: Dab some glue on the end of the ears where you want to stick them.
Step 8: Now you can glue them into place on top of your Noodoll pumpkin. You may need to hold them in place for a minute or two to make sure that they are sticking properly.
Step 6: Draw the Ricemonsters ears on your piece of felt using a pencil and cut them out.
Step 7: Dab some glue on the end of the ears where you want to stick them.
Step 8: Now you can glue them into place on top of your Noodoll pumpkin. You may need to hold them in place for a minute or two to make sure that they are sticking properly.
We have made some extra Ricemonster pumpkins with Ricecracker and Ricecarrot! We hope that you enjoyed this pumpkin decorating DIY project. Let us know if you come up with any other great Ricemonster pumpkin designs! Don’t forget to share your DIY projects with us by tagging us on Instagram or Facebook with @ilovenoodoll!
Step 1: For this DIY project you will need a pumpkin (preferably small), some acrylic paints, a paint brush, a pair of scissors, some coloured felt, a pencil and glue.
Step 2: Select your pumpking, if you are creating more than one Noodoll pumkin, you can choose different sizes!
Step 3: Before you start, choose with Noodoll Ricemonster you would like to make your pumpkin into. For this demonstration we chose the sweet Riceberg polar bear. Once you have chosen your character, mix your paint to match the colour of their fur, you will also need some black or other colours to paint their face.
Step 4: Using a paintbrush, paint the whole surface of your pumpkin. You will need to paint two layers to acheive a smooth colour, make sure you wait for your paint to dry in between layers and before going to step 5.
Step 5: Draw the Ricemonsters face onto the pumpkin using a pencil, then go over the design with a thin paintbrush and some black paint. Alternatively, you can draw the face on using a permanant marker.
Step 6: Draw the Ricemonsters ears on your piece of felt using a pencil and cut them out.
Step 7: Dab some glue on the end of the ears where you want to stick them.
Step 8: Now you can glue them into place on top of your Noodoll pumpkin. You may need to hold them in place for a minute or two to make sure that they are sticking properly.
We have made some extra Ricemonster pumpkins with Ricecracker and Ricecarrot! We hope that you enjoyed this pumpkin decorating DIY project. Let us know if you come up with any other great Ricemonster pumpkin designs! Don’t forget to share your DIY projects with us by tagging us on Instagram or Facebook with @ilovenoodoll!